Enhance Your iPhone's Audio Experience: Top 10 Tips for Better Call Quality

Enhance Your iPhone’s Audio Experience: Top 10 Tips for Better Call Quality
Quick Links
- Toggle Airplane Mode on and Off
- Clean the Earpiece and Microphone
- Reconnect Bluetooth Accessories (or Ditch Them Entirely)
- Use Speaker Phone Instead
- Disable Voice Isolation Mode
- Configure Wi-Fi Calling
- Disable Your VPN
- Update Your iPhone
- Reset Network Settings
- Consider Raising a Complaint With Your Carrier
Are you having problem with muffled and unclear sound quality or dropped calls on your iPhone? This could be due to a network glitch, a dirty earpiece or microphone, or a malfunctioning accessory. Here are some ways you can fix the problem.
Toggle Airplane Mode on and Off
You’re on the move, trying to call your friend or a family member, but for some odd reason the call doesn’t go through. It’s even more annoying when the call connects, but you can’t hear a single word that the other person is saying. What do you do?
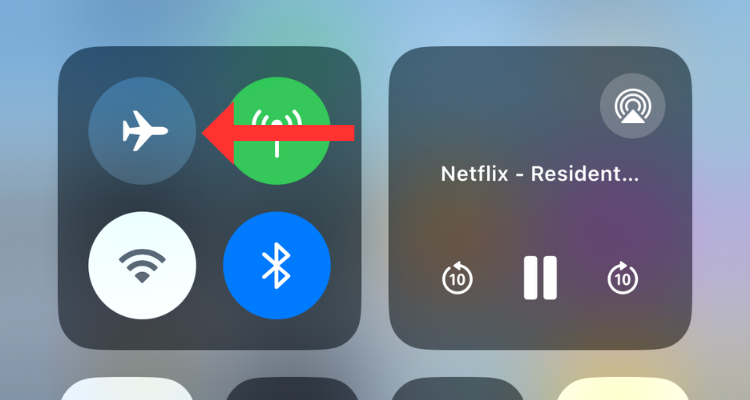
The first thing that you should try is to toggle airplane mode on and off. Turning on airplane mode forces your iPhone to disconnect from cellular services. When you turn it back on, your iPhone effectively resets its connection with the cellular carrier. If a temporary connection issue is affecting the call quality, this method could fix that.
To do this, swipe down from the top right corner of the screen to open Control Center and hit the airplane mode button once. After waiting a few seconds, hit the button again to turn it off.
If toggling the airplane mode on and off doesn’t work, you can try restarting your iPhone . This should fix any software-related issues or glitches that might cause the problem. To reboot your iPhone, press and hold the power button and either of the volume buttons, then drag the power slider to the right.
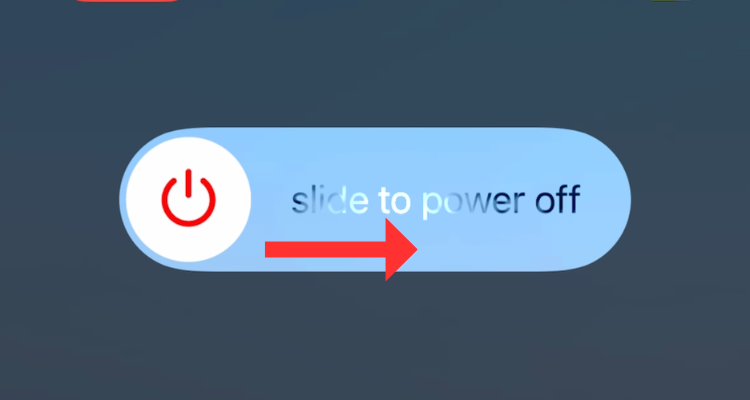
After waiting a few seconds, press and hold the power button until you see the Apple logo. You can also ask Siri to “restart my iPhone.”
Clean the Earpiece and Microphone
A dirty earpiece or a clogged microphone grill are among the most common causes of poor call quality on iPhones. To remedy this, you can take a soft-bristled toothbrush and gently rub it across the earpiece opening. Similarly, use the toothbrush to remove any dirt or accumulations from the microphone grill. While you’re at it, feel free to thoroughly by safely clean your iPhone .
If you have one of an iPhone or AirPods cleaning kit lying around, use the sharp-ended instrument to prick the gunk out of the earpiece or the microphone grill (especially the metallic mesh that covers both components). Once you clean the mesh, the sound coming out of it should improve significantly.
Reconnect Bluetooth Accessories (or Ditch Them Entirely)
Kris Wouk / How-To Geek
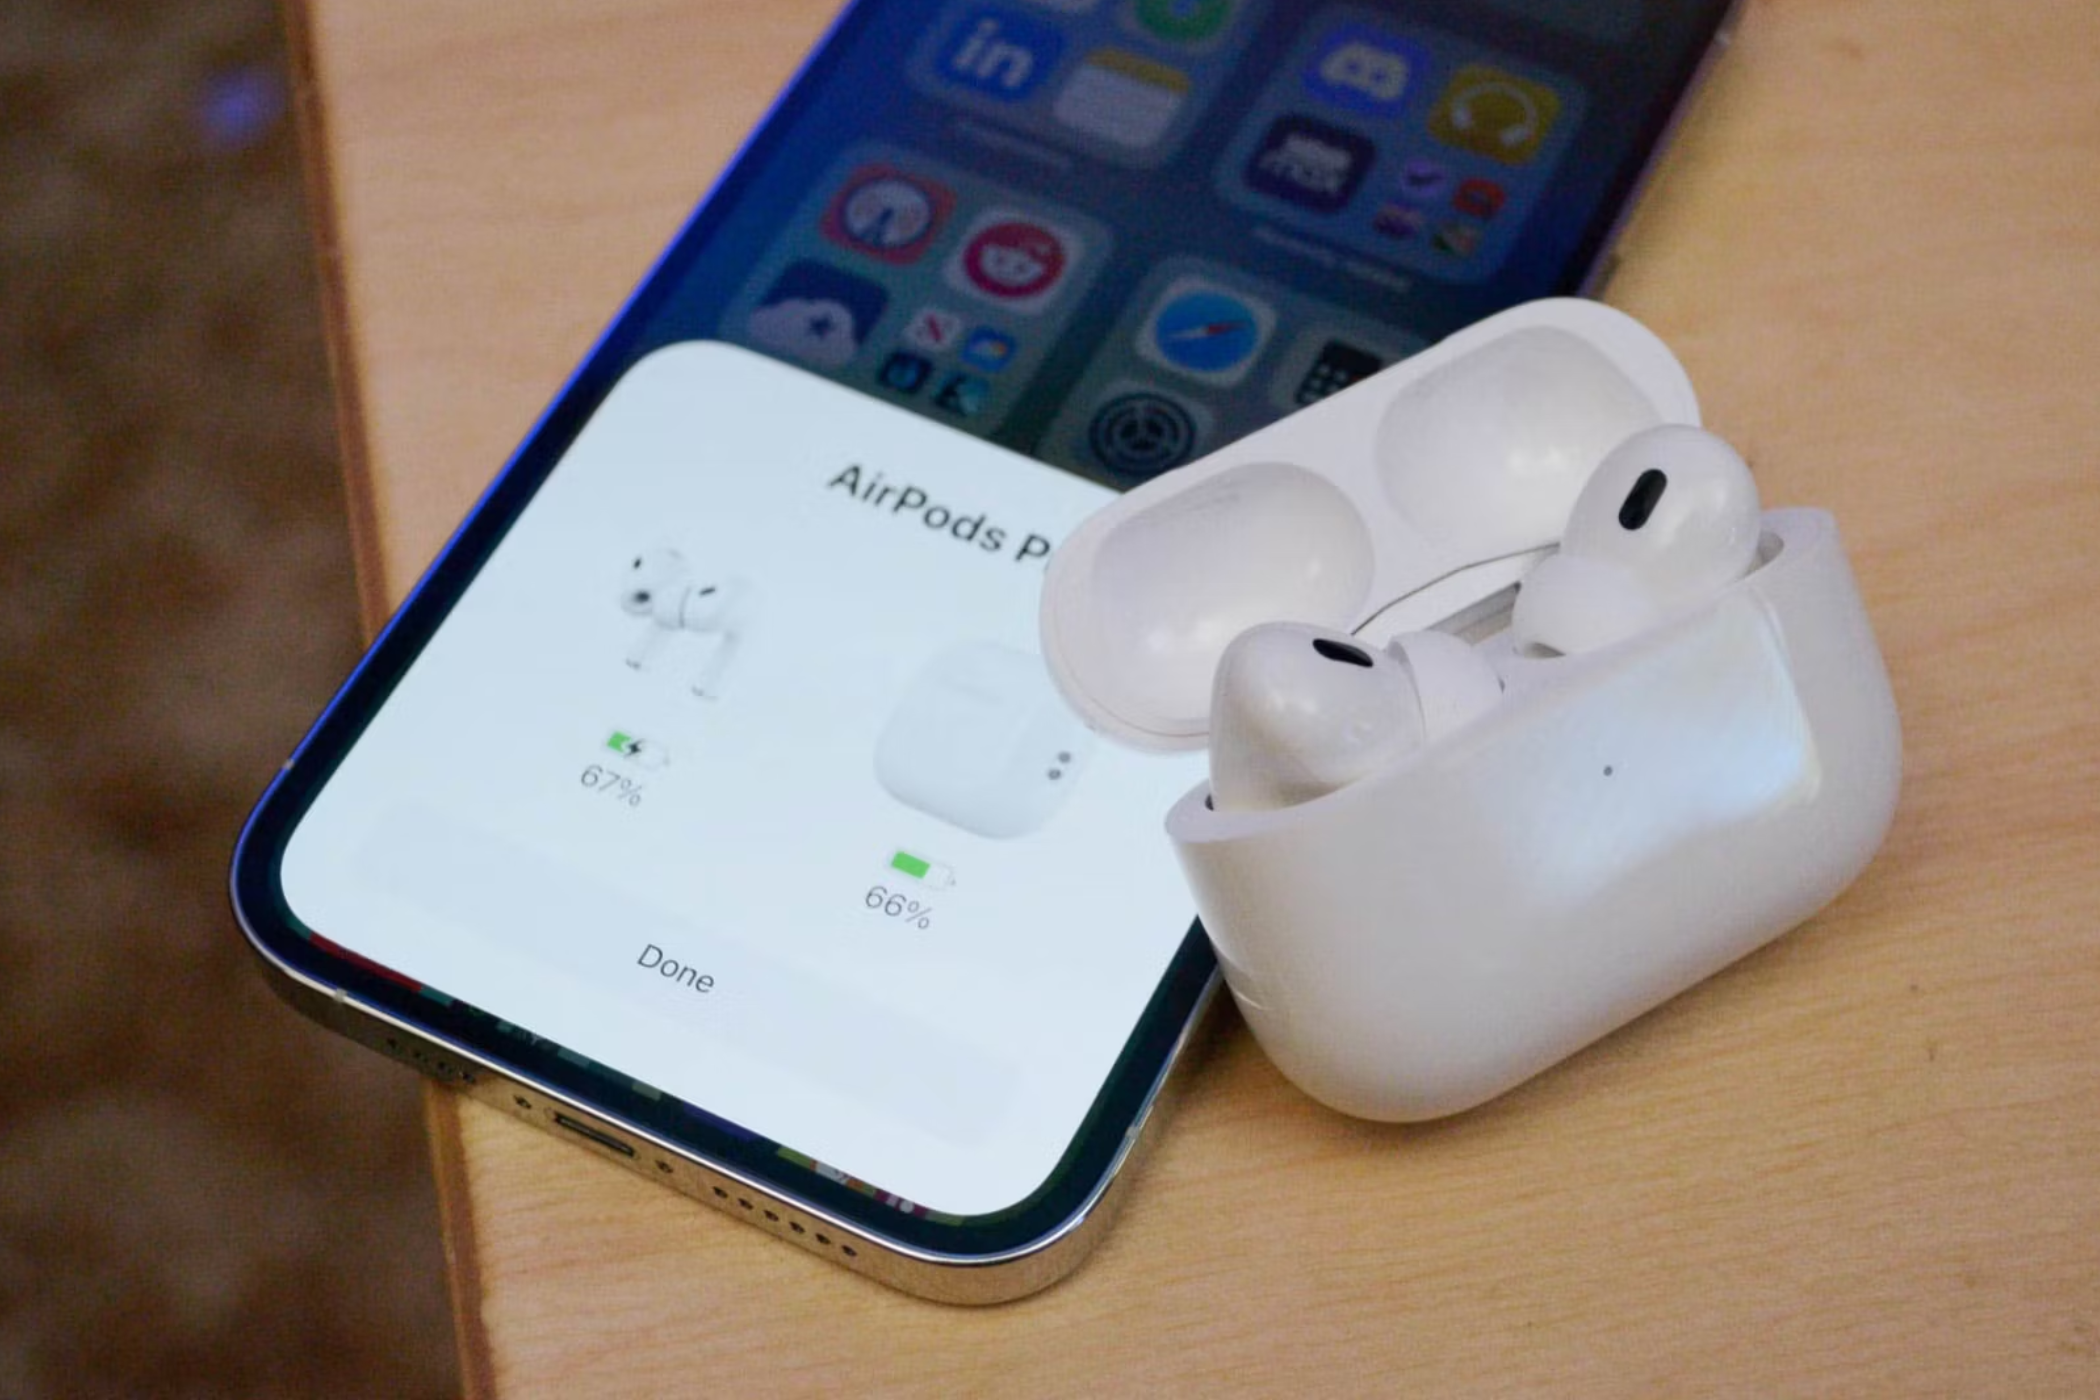
If you’re using a pair of Bluetooth earbuds, consider reconnecting them to your iPhone. This will eliminate any connectivity issues that could hamper call quality. While the steps to reconnect the Bluetooth earbuds vary based on the device, you can “Forget” any devices from the Bluetooth menu.
Just head to Settings > Bluetooth and tap the arrow next to the device’s name. Now hit “Forget This Device” and confirm.
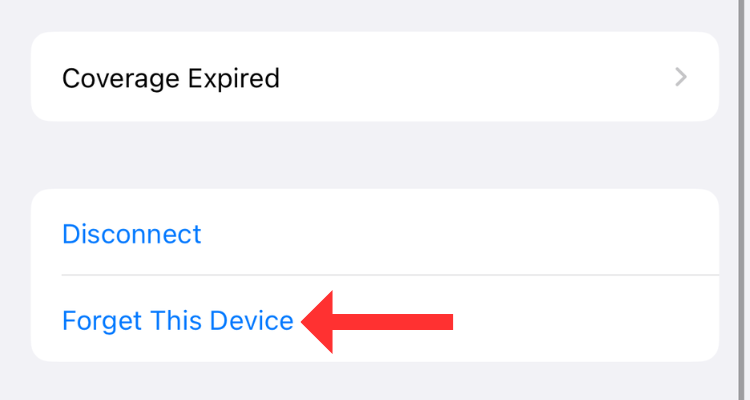
Once you forget the device, you’ll need to pair it with your iPhone again as per the manufacturer’s instructions. This usually involves putting it into pairing mode and using the Bluetooth menu to select it.
If you’re experiencing poor call quality to the extent that the other person can’t hear what you’re saying almost every time, the problem could be with your Bluetooth device. To confirm, pair your earbuds or headphones with another smartphone and check the audio quality on the call.
If the problem persists, there’s a solid chance that your earphones are the root cause. Unfortunately, many Bluetooth earbuds fail to satisfactorily pick up the user’s voice during phone calls, primarily due to their design and hardware limitations.
However, if you’ve got to keep your hands free to take calls, consider getting well-reviewed neckband-style earphones.
Use Speaker Phone Instead
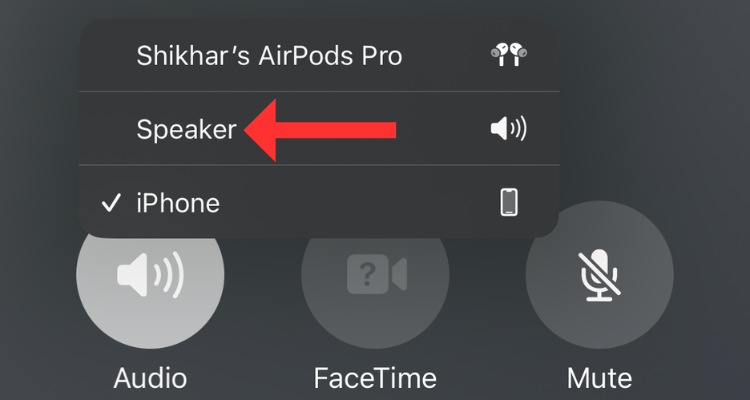
If it’s your iPhone’s earpiece that has gone bad, you can answer calls on speakerphone instead. Yes, we understand that it poses some privacy-related concerns, especially if you’re in a public place. You also might be a bother to anyone else nearby. However, it’s still a legitimate way to answer calls without making the caller wait until you find a fix for the earpiece.
You can switch to “Speaker” using the “Audio” button visible during a call.
While answering a call on speakerphone, consider turning down the volume. You’d have to move the phone around quite a bit (taking the speaker to your ear and then bringing the microphone to your mouth), but this way, other people won’t be as aware of the conversation.
Disable Voice Isolation Mode
With iOS 16.4, Apple released Voice Isolation mode for all regular calls. While the feature intends to filter out your voice from the sounds in the background, some users have complained about it making call quality worse. Since the feature relies on advanced processing, it can sometimes add a bit of distortion to your voice.
Further, in areas with a lot of noise, such as a busy street or a construction site, the Voice Isolation mode implements heavy processing which could cancel out some parts of your voice. In my time with the feature, I’ve found that it works best when you hold the microphone pretty close to your face. The further the microphone gets, the more my voice starts sounding unnatural and muffled.
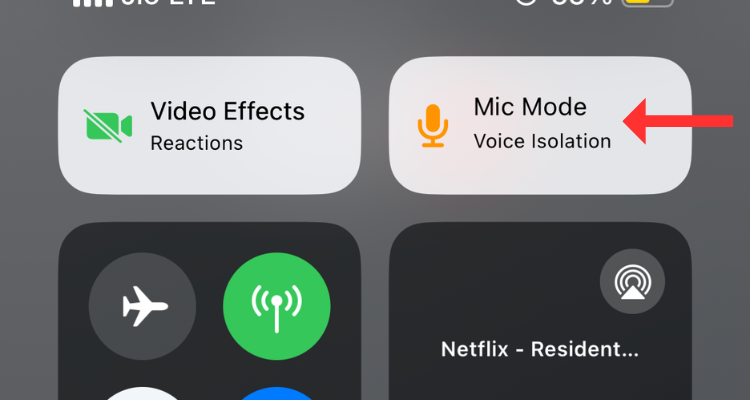
To disable Voice Isolation mode, head to Control Center during a call and select Mic Mode.
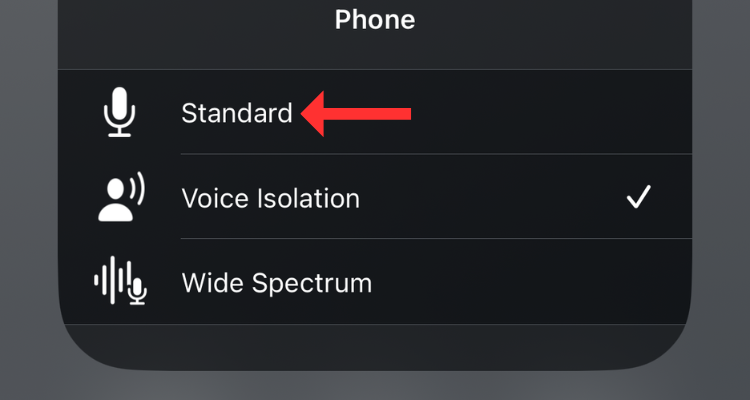
From the available microphone mode options, select Standard.
Configure Wi-Fi Calling
Traditionally, Wi-Fi calling is considered a way to improve call quality in areas with poor cellular reception. However, if there’s not enough available bandwidth due to overcrowding of the network or poor transmission from the service provider, Wi-Fi calling can create more problems than it can solve. For instance, an unstable Wi-Fi connection can cause your voice to break or even lead to call drops.
Hence, consider turning off the feature from Settings > Cellular > Wi-Fi Calling.
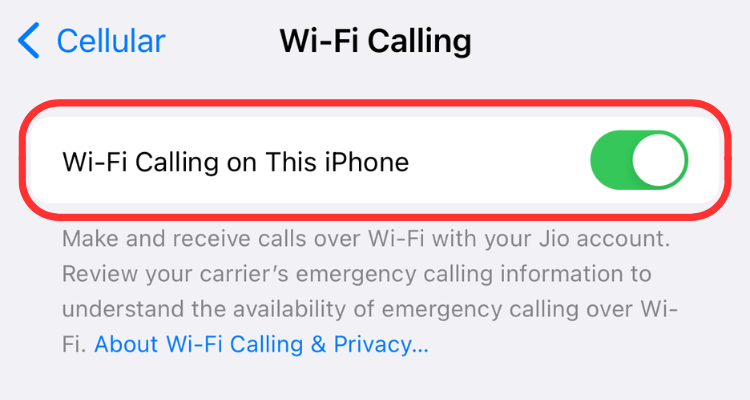
On the other hand, if you’re confident about your wireless network’s bandwidth, enabling the feature could instantly improve the call quality, especially if you aren’t getting proper cellular coverage. You’ll need to decide whether or not Wi-Fi calling is worth it based on your own situation.
Disable Your VPN
If you make a lot of VoIP calls , consider disabling the VPN. VoIP relies on a smooth and steady internet connection so a slow VPN could limit the available bandwidth. Further, private networks could add latency, increasing the time it takes for the other person to hear what you say.
Together, these factors could degrade the call quality on your iPhone. So, if you’re experiencing issues with VoIP calls, disconnect the VPN and try again. To do this, head over to your VPN app and disconnect from the network (just remember to enable your VPN again once you’re done).
Update Your iPhone
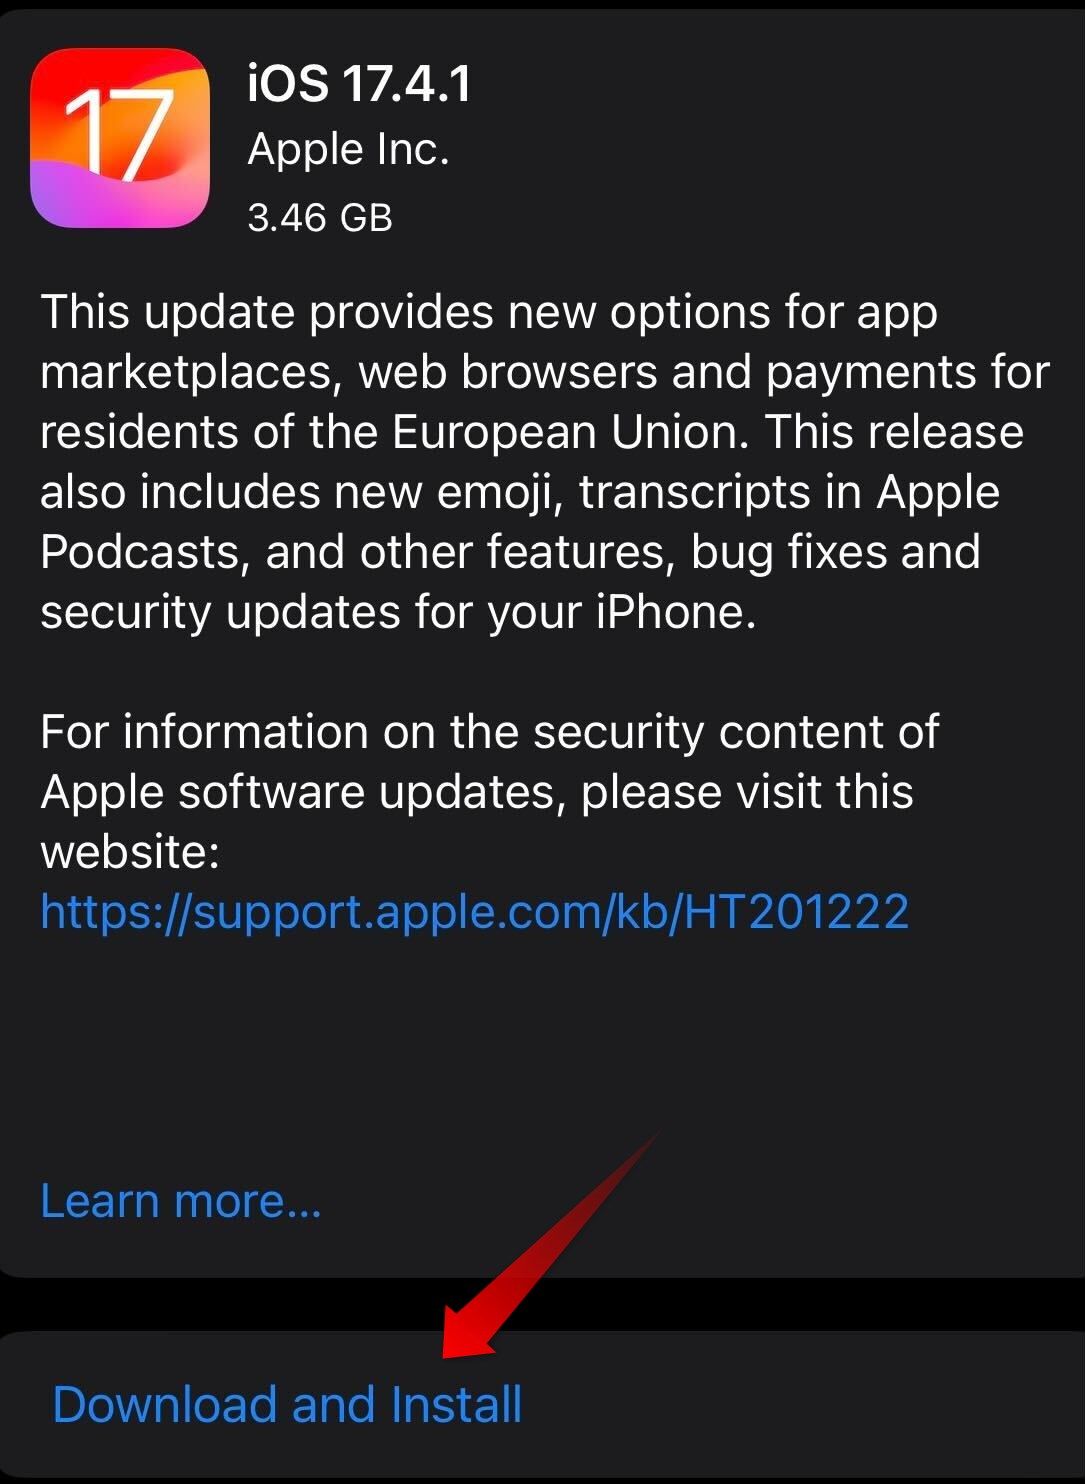
Before we proceed with the final step of resetting the network settings, you should try updating your iPhone to the latest iOS version . More often than not, updating the iPhone restores many software and hardware components to their default settings, fixing any bugs, glitches, or other issues that Apple is aware of.
To update your iPhone, head to Settings > General and hit Software Update. If an update is available, consider installing it.
Reset Network Settings
Resetting network settings is another fix that can help you improve call quality by re-configuring the wireless connections. While this method can potentially rectify the issue, it entails erasing all your saved Wi-Fi passwords and Bluetooth connections. Hence, we’ve reserved it as the last troubleshooting method that can potentially improve the call quality on your iPhone. That said, if you’re going to give it a try, keep all the passwords handy for after you’re done with resetting the network settings.
Head to Settings > General > Transfer or Reset [Device].
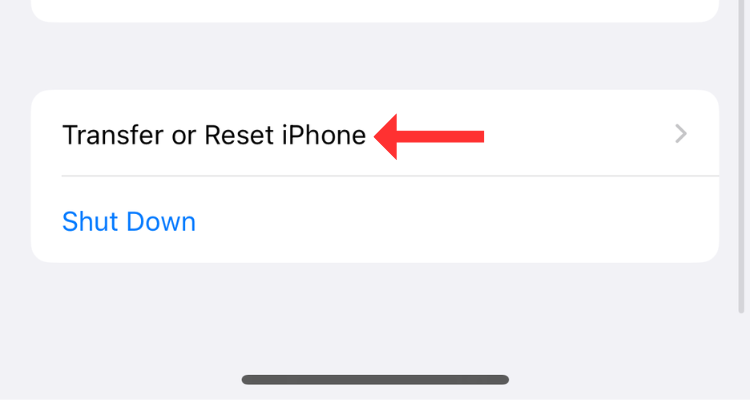
Tap on Reset.
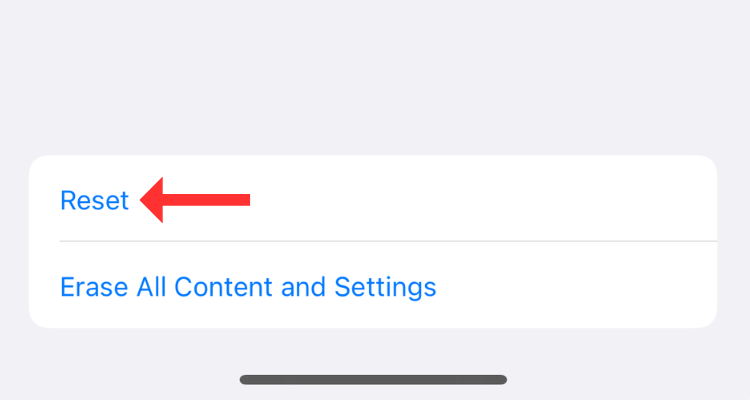
Then select “Reset Network Settings” from the options on the screen.
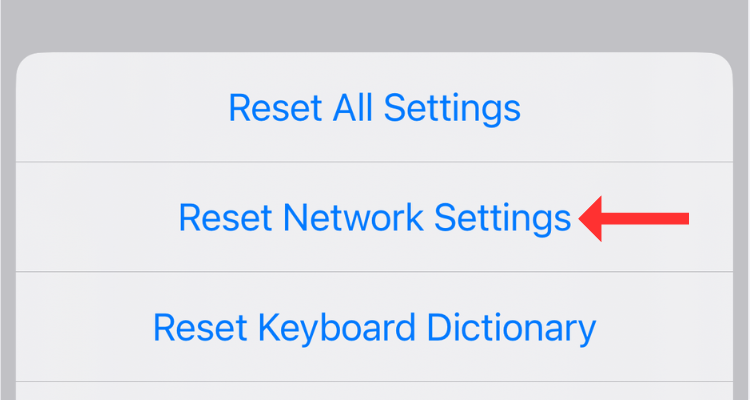
Enter your device’s passcode and confirm the action on the following screen.
Consider Raising a Complaint With Your Carrier
As a last resort, you can raise a complaint with your carrier, telling them about the area where you reside or where you regularly face the problem. Further, if there’s a deep-rooted hardware issue affecting the call quality on your iPhone, you might want to make an appointment with the authorized repair center and take your device in for a diagnosis.
Also read:
- [New] 2024 Approved Step-by-Step Capturing Your Roblox Journeys on a Mac
- 2024 Approved Detect Subtle Moan Vocalizations
- Boost Your iPhone's Capacity with IMyFone Umate Pro: Top Reviews and Effective Alternatives
- Complete Guide: Removing iOS 18 Lock Screen Passcode with Step-by-Step Instructions
- Delete Your iPhone To-Do's Effortlessly: Updated Techniques
- Expert Guide to Instant X23^Eon_Lenovo Laptop Driver Updates – Get Started Today!
- Exploring the Capabilities of SJ-CAM S6
- How to Clear Out Unwanted eBooks From Your iCloud Account & Reclaim Space
- How To Completely Remove Siri Suggestions From Your iPhone or iPad: A Step-by-Step Guide
- Revitalize Your Touchpad Experience with Rapid Synaptics Driver Updates for PS/2 Ports
- Step-by-Step Guide: Preparing Your iPhone for Resale
- The Best Time to Post on IG for Maximum Reach for 2024
- The Roadmap to Creating Successful YouTube Collaborations for 2024
- Top 3 Techniques for Thorough iPhone Data Wipe: Complete & Safe
- Updated How to Flip a Clip in Final Cut Pro with 4 Steps for 2024
- Title: Enhance Your iPhone's Audio Experience: Top 10 Tips for Better Call Quality
- Author: Daniel
- Created at : 2024-10-02 17:42:15
- Updated at : 2024-10-06 16:26:42
- Link: https://os-tips.techidaily.com/enhance-your-iphones-audio-experience-top-10-tips-for-better-call-quality/
- License: This work is licensed under CC BY-NC-SA 4.0.