How To Use Your AirPods Pro: A Detailed Walkthrough of Device Management, Innovative Capabilities, and Intuitive Hand Gestures
How To Use Your AirPods Pro: A Detailed Walkthrough of Device Management, Innovative Capabilities, and Intuitive Hand Gestures
Quick Links
- Use AirPods Pro 2 to Control Volume
- Use Touch Controls to Control Playback
- Summon Siri on AirPods Pro for More Control
- Use Active Noise Cancellation to Remove Background Noise
- Use Transparency Mode to Hear the World Around You
- Find Your Lost AirPods Pro With or Without the Case
- Charge Quickly and Wirelessly
- Sync Once, Use Everywhere
- Connect to Regular Bluetooth Audio Sources
- Listen to Spatial Audio (and Create a Custom Profile)
- Share Audio with Other AirPods Users
- Enable or Disable Notification Announcements
- Test AirPods Pro Ear Tip Fit
- Make Your AirPods Pro Even Better
Apple’s premium in-ear buds are loaded with features. Whether you have first or second-generation AirPods Pro, you can control what you’re listening to, use gestures, and more.
Use AirPods Pro 2 to Control Volume
If you have a pair of second-generation AirPods Pro (released in late 2022), you can use the touch-sensitive stem to control the volume with a swipe. First, place your thumb on the stem of an AirPod and then use your index finger to swipe up and down to control the volume.
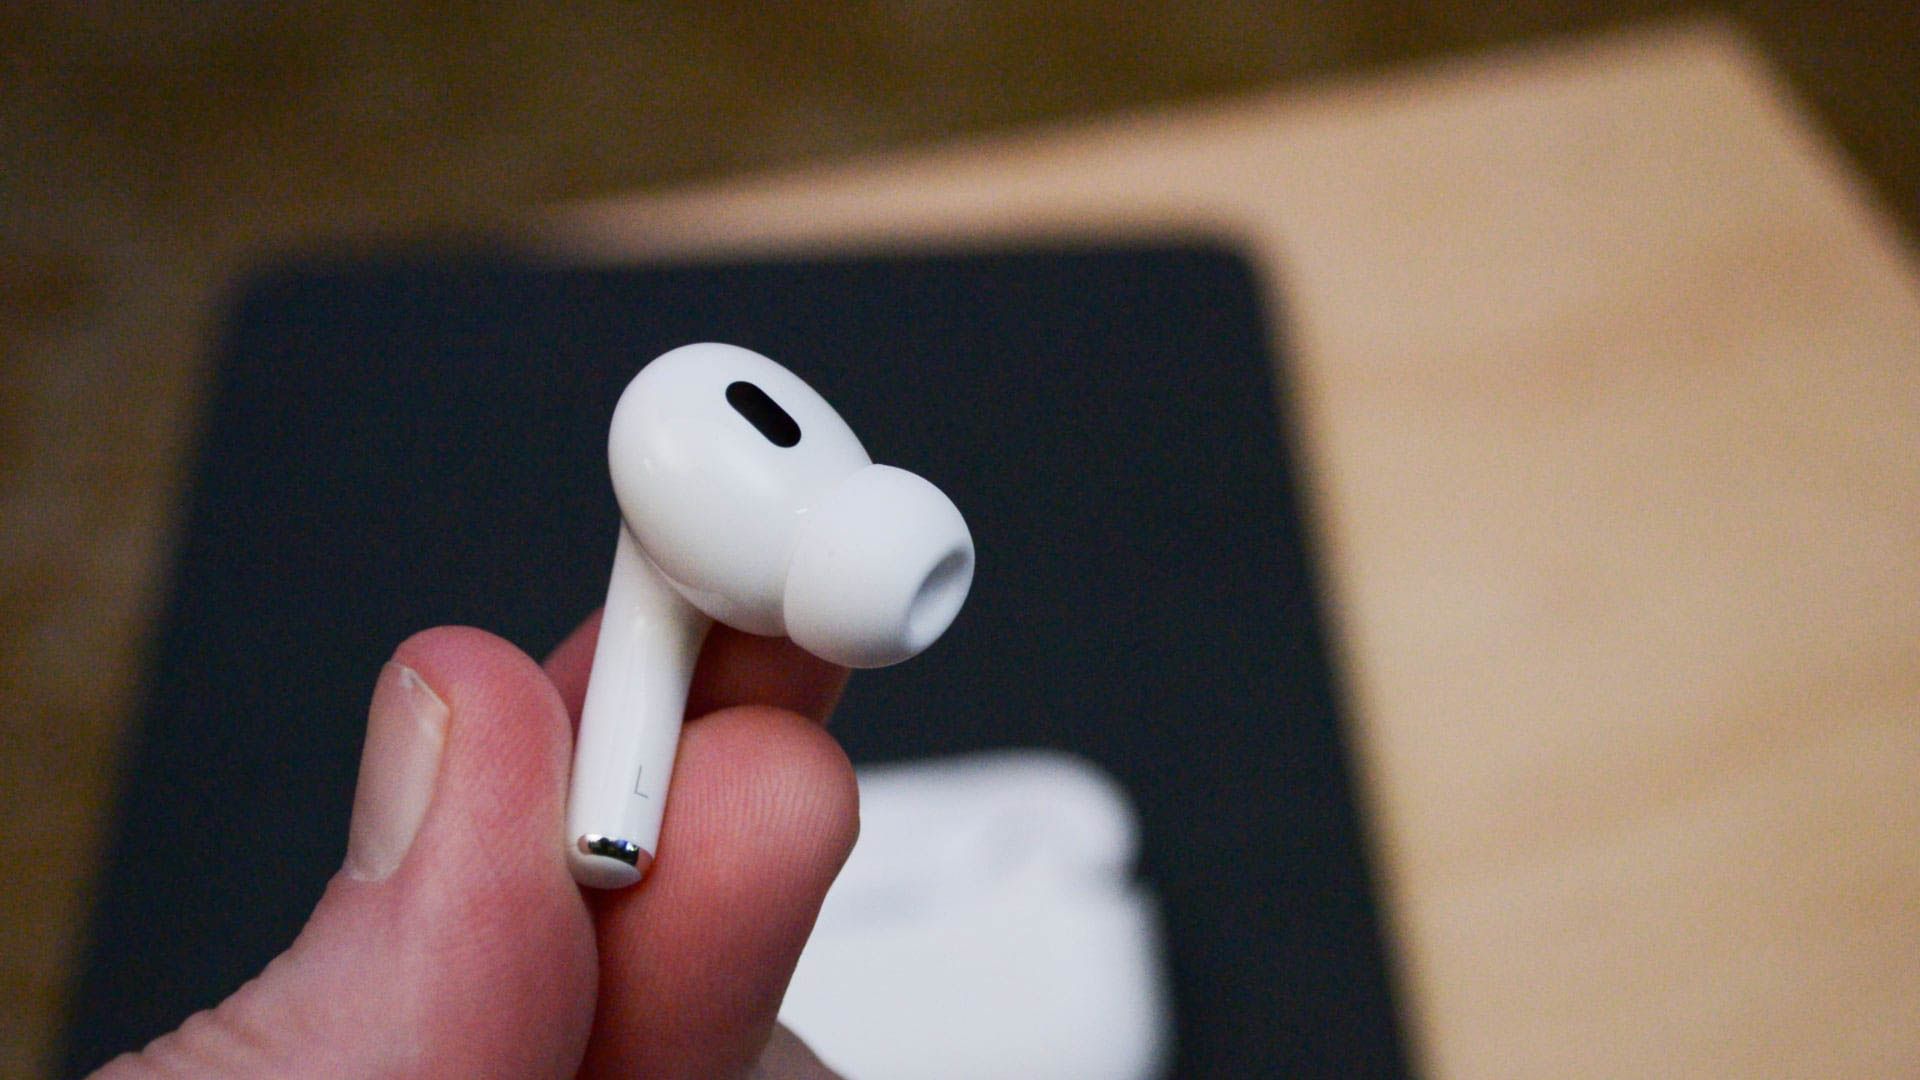
Kris Wouk / How-To Geek Kris Wouk / Review Geek Kris Wouk / LifeSavvy
You may need to practice this to get it right, but it beats having to take your iPhone out of your pocket. If you have an Apple Watch you can also control iPhone volume and playback using the Now Playing app.
Use Touch Controls to Control Playback
Both first and second-generation AirPods Pro use similar force touch gestures to control playback and other features. These work using a squeeze, with different controls accessed by squeezing multiple times. Playback controls are:
- Once: Play or pause media, answer an incoming call, hang up a call in progress.
- Twice: Skip forward.
- Three times: Skip backward.
- Squeeze and hold: Toggle Noise Control (by default).

Summon Siri on AirPods Pro for More Control
You can do a lot with your AirPods Pro without ever touching your phone, thanks to Siri. Apple’s voice assistant can be summoned in a few ways. The first is using the “Hey Siri” voice command . For this to work, you’ll need to have “Hey Siri” enabled under Settings > Siri & Search with your AirPods Pro in your ears.
The other way you can access Siri is by changing a shortcut within your AirPods Pro settings. Put your AirPods Pro in your ears and head to Settings > Bluetooth and tap the “i” next to your AirPods Pro. Scroll down to the “Press and Hold AirPods” section and choose the AirPod you’d like to customize.
You can now set one AirPod to summon Siri and use the other for Noise Control. This is a good idea if you’ve disabled “Hey Siri” but still want to use the assistant occasionally. You can use Siri to do things like select specific tracks or albums, play specific podcasts, hear your messages or email, get directions, and more.
Use Active Noise Cancellation to Remove Background Noise
Active Noise Cancellation (ANC) is one of the best AirPods Pro features. It allows you to remove background noise so that you can better hear whatever it is you’re listening to. It’s especially handy for listening to music at more reasonable volumes in loud environments.
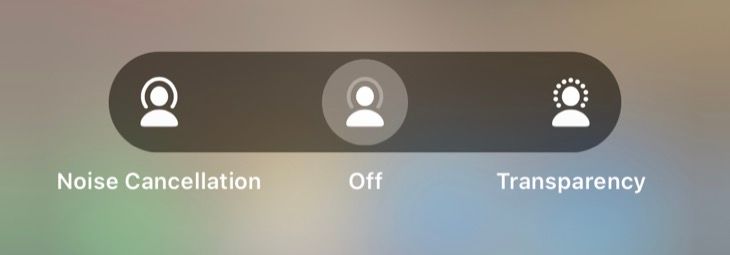
By default, you’ll be able to switch between ANC and Transparency using by squeezing and holding an AirPods Pro stem. You can also see these controls by long-pressing the Volume slider in Control Center on an iPhone or iPad (or clicking Control Center > Sound then selecting your AirPods Pro on a Mac).
You can customize how Noise Control works and remove ANC if you want under AirPods Settings. Head to Settings > Bluetooth and tap the “i” next to your AirPods Pro and then choose an AirPod to customize under the “Press and Hold AirPods” section.
Use Transparency Mode to Hear the World Around You
Transparency mode does the opposite of ANC, where it lets in more of the world around you so that you don’t have to remove your AirPods Pro from your ears in order to hear what’s going on. You may still need to pause any music or podcasts you’re listening to (with a single squeeze) for this to be most effective.
Like ANC, you can toggle between these two modes using a squeeze-and-hold gesture by default. You can also customize this behavior under your AirPods Pro settings. You can also toggle Noise Control settings with a Shortcuts widget .
Find Your Lost AirPods Pro With or Without the Case
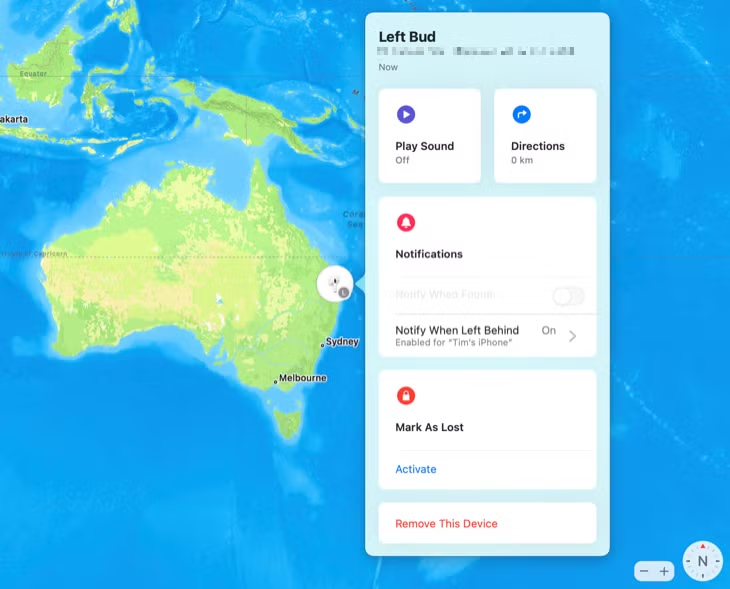
You can find your AirPods using Apple’s Find My network . When you first connect your AirPods they should be associated with your Apple ID, after which time they’ll appear within the Find My app for iPhone, iPad, Mac, or on the web at iCloud.com . You can opt out of Find My integration under AirPods settings, but we’d recommend leaving it on.
Which generation of AirPods Pro you have determines which features you’ll get access to. Second-generation AirPods Pro include a speaker on the case and in-case support for finding your AirPods. First-generation AirPods Pro will record where they were when you put them away. Both generations include some sort of earbud location.
You can access these features by opening Find My on your chosen device and selecting your AirPods Pro (look in the Devices list). Click or tap on the “i” next to your AirPods Pro then use the “Play Sound” button to play audio on either the case or individual AirPods.
Charge Quickly and Wirelessly
AirPods Pro earbuds can charge quickly within the case. As long as your case has charge, you can recover around an hour of listening or talk time by putting your AirPods into the charging case for only five minutes. Apple promises around 24 hours (first-generation) to 30 hours (second-generation) of listening time with a fully charged AirPods Pro case and multiple charges.
You can charge the case with a standard Apple Lightning charger or using a quality Qi-certified wireless charger . Second-generation AirPods Pro use the MagSafe charging case, which allows you to charge your AirPods using Apple’s magnetic wireless charger for iPhone .
Sync Once, Use Everywhere
Once you’ve synced your AirPods Pro, they should be tied to your Apple ID which means they sync with your other devices using iCloud. On top of this, they should switch between devices as and when you use them. So if you move from your iPhone to your iPad, your AirPods should switch devices without intervention from you.

You can turn automatic AirPods switching off if you want to, for example if you’d rather your AirPods automatically switch between some devices and not others. If this isn’t working as you’d expect it to, check out our tips for solving problems with AirPods that don’t switch automatically .
Connect to Regular Bluetooth Audio Sources
You can also use your AirPods as regular wireless earbuds with any Bluetooth audio source. They’ll remain tied to your Apple ID and can’t be linked to another Apple device. You can switch back to your iPhone, iPad, and so on at any time.
To do this, put your AirPods Pro in the case and leave the top open. Press and hold the button on the back of the case for a few seconds until the LED indicator starts to blink white. Your AirPods are now in pairing mode. Use your device’s Bluetooth menu to find and sync your AirPods.
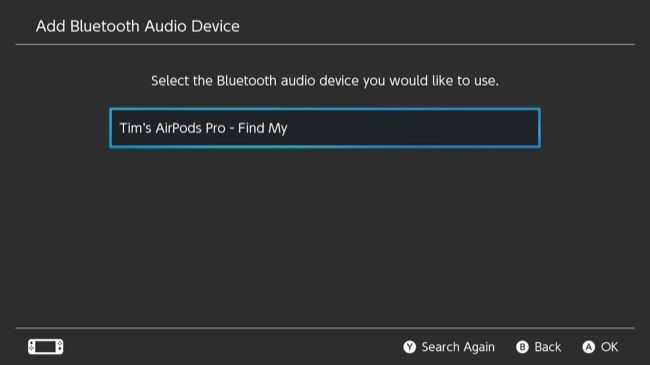
You can use this trick to sync your AirPods with a Nintendo Switch or even an Android phone .
Listen to Spatial Audio (and Create a Custom Profile)
Spatial audio offers a simulated surround setup and it’s a key feature of the AirPods Pro. You can listen to spatial audio sources like Dolby Atmos via Apple Music to get a more “immersive” listening experience. On top of this, AirPods Pro offer head tracking with spatial audio which makes for a more dynamic listening experience.
The results won’t be to everyone’s tastes. Some music sounds less claustrophobic and fatiguing when listening in spatial audio, while others lack impact and leave you craving the “flat” stereo mix. It’s worth a shot but what you listen to and your personal tastes will heavily impact your head-tracking spatial audio experience . Spatial audio also works with Netflix and other video streaming apps.
You can enable spatial audio from Control Center by swiping down from the top-right corner of the screen on an iPhone or iPad, then long-pressing the Volume slider. Tap the “Spatial Audio” control in the bottom-right corner to choose between head-tracking, fixed position, and off.

For a superior spatial audio experience, head to Settings > Bluetooth and tap the “i” next to your AirPods on an iPhone or iPad. Scroll down to the “Spatial Audio” section and tap “Personalized Spatial Audio” to personalize spatial audio listening for your ears .
Share Audio with Other AirPods Users
AirPods Pro, among Apple’s other headphones (including Beats models), can be used with the Share Audio feature on iPhone and iPad. To use this, simply swipe down to reveal Control Center on the source iPhone then tap the “Now Playing” box followed by the AirPlay Audio icon.
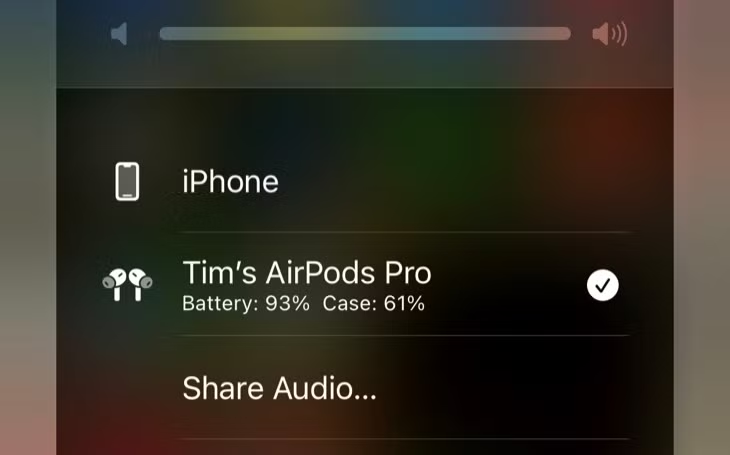
A list of sources will appear. Tap “Share Audio…” and bring the AirPods Pro or the iPhone they’re paired with into range. Once paired, both sets of headphones or earbuds will have separate volume controls to control listening levels independently.
Enable or Disable Notification Announcements
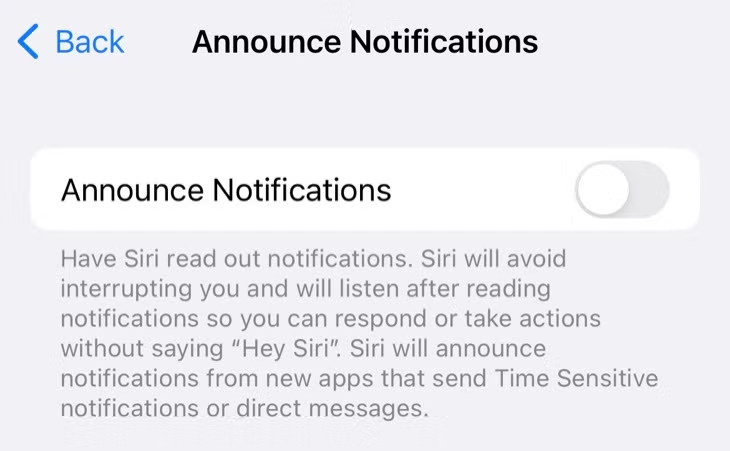
Your iPhone will attempt to use Siri to announce notifications while wearing your AirPods. You’ll be asked to confirm this when you first set up your AirPods, and you can choose to enable call announcements, standard notification announcements, and time-sensitive announcements from various apps.
You can change these preferences under Settings > Notifications > Announce Notifications or Settings > Phone > Announce Calls.
Test AirPods Pro Ear Tip Fit
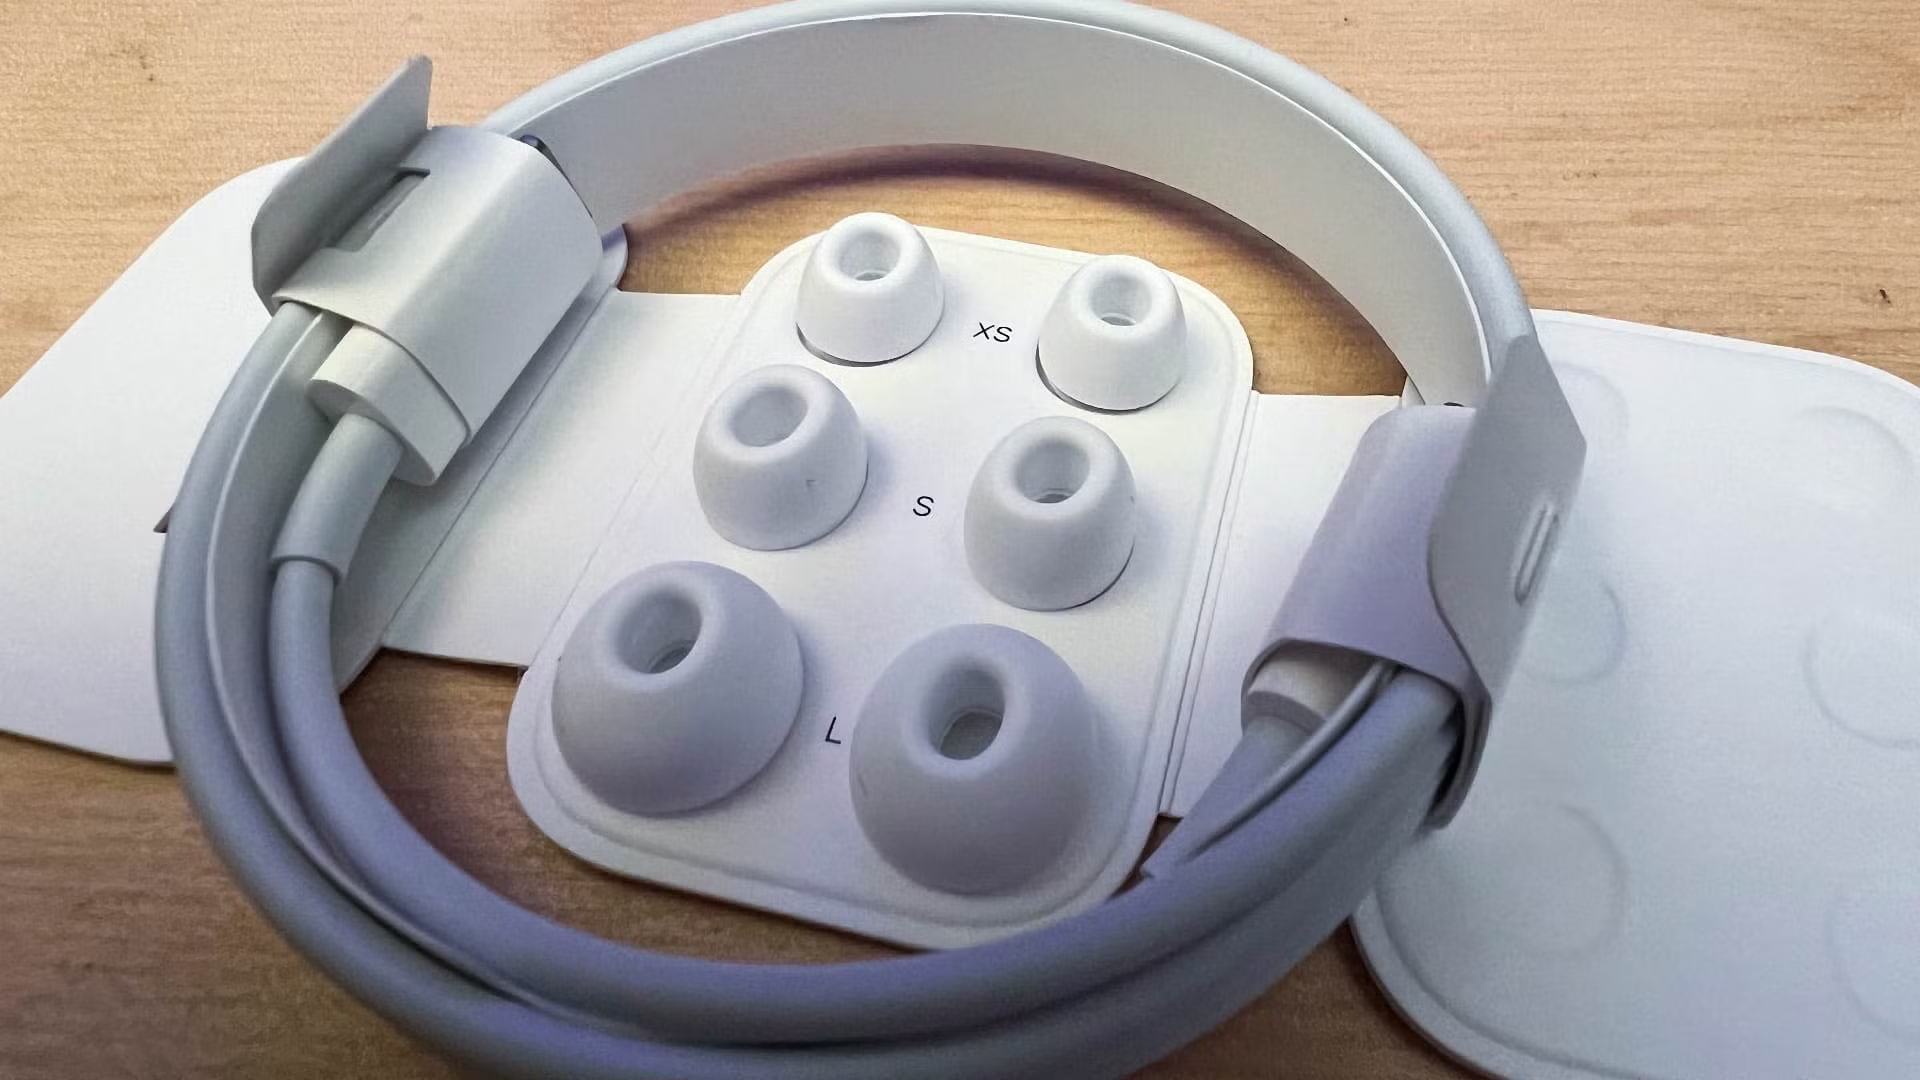
AirPods Pro are designed for a snug fit with your ear canal in order to block out as much environmental noise using passive isolation. If your ear tips are too large, they may be uncomfortable and fall out. If they’re too small, they might not make a good seal and could also fall out.
Test your fit under Settings > Bluetooth then tap the “i” next to your AirPods. Use the “Test Ear Tip Fit” setting while wearing both AirPos Pro. The test will tell you if your AirPods Pro tips are too small, but not necessarily if they’re too big (you’ll need to be the judge of comfort for yourself).
Kris Wouk / How-To Geek Kris Wouk / Review Geek Kris Wouk / LifeSavvy
If you’re not impressed by the included ear tips, you can buy some aftermarket accessories to stop AirPods Pro falling out of your ears . Ear hooks are the obvious choice, but memory foam tips may provide a better seal with your ear for improved sound quality.
Make Your AirPods Pro Even Better
AirPods Pro are arguably the best wireless listening aids that Apple makes . They fit better than standard AirPods, have Noise Control features including Transparency mode for convenience and safety, and they lack the exorbitant price tag of the AirPods Max .
But AirPods Pro aren’t perfect. Get even more life out of your AirPods Pro with the best aftermarket accessories .
Also read:
- [Updated] In 2024, The Complete Guide to Virtual Whiteboard Excellence for Zoom Sessions (Desktop/iOS/Android)
- Best First Flight Drones for Youngsters & New Pilots for 2024
- Complete Walkthrough: How to Thoroughly Erase Your Typed Messages From an iPhone's Keyboard
- Descubre Las Mejores Herramientas De Sincronización De Archivos Sin Coste en Windows Mediante Software Libre
- Effective Techniques for Deep Clearing Your iPad's Storage and Boosting Performance
- Effortless Guide: Removing Songs From Your iPhone with Minimal Hassle
- Effortless Space Optimization for Your iPhone - Top Strategies for Extra Storage
- How to Maximize Profits: Selling Your Used or Damaged iPhone
- In 2024, 4 Ways to Transfer Music from Honor V Purse to iPhone | Dr.fone
- Master the Art of Gaming Best Monitors & TVs For Xbox Series X
- Mastering the Fixes for Battle.net Access Problems: The Definitive 2024 Edition
- Maximize Earnings on Old iPhones: A Step-by-Step Tutorial for Safe Sales & Increased Revenue
- No Official ChatGPT Client for Windows—Don't Get Duped by Malicious Clones
- Revealed Secrets Top 15 Stabilizers & Holders for GoPro for 2024
- Title, Tag & Description Mastery for YouTube Success for 2024
- Title: How To Use Your AirPods Pro: A Detailed Walkthrough of Device Management, Innovative Capabilities, and Intuitive Hand Gestures
- Author: Daniel
- Created at : 2024-10-17 04:14:54
- Updated at : 2024-10-17 17:03:14
- Link: https://os-tips.techidaily.com/how-to-use-your-airpods-pro-a-detailed-walkthrough-of-device-management-innovative-capabilities-and-intuitive-hand-gestures/
- License: This work is licensed under CC BY-NC-SA 4.0.