
Step-by-Step Guide: Retrieving Lost Images From an iPhone/iPad

Step-by-Step Guide: Retrieving Lost Images From an iPhone/iPad
Quick Links
- Recover a Photo From Recently Deleted
- Recover Photos from a Backup
- Restore your iPhone from an iTunes Backup
- Restore Your iPhone From an iCloud backup
Key Takeaways
- Check “Recently Deleted” in your iPhone’s Photos app to see if your deleted photo is still there. If it is, select it and then tap “Recover.”
- You can restore your iPhone from an iTunes or iCloud backup. Keep in mind that you will lose any data created or changed since the backup was created.
- Use third-party tools like iBackup Extractor or iMazing to recover photos from your iTunes backups.
If you’ve accidentally deleted a photo on your iPhone, there are several ways you might be able to recover it. We’re going to run through a few of the ways you might be able to recover a deleted photo, and while they may not all be specific to your situation, hopefully at least one will get your photo back where it belongs — in your photo library.
Recover a Photo From Recently Deleted
The first and easiest place to look is on your iPhone. Open the Photos app and then tap “Albums” at the bottom of the screen.

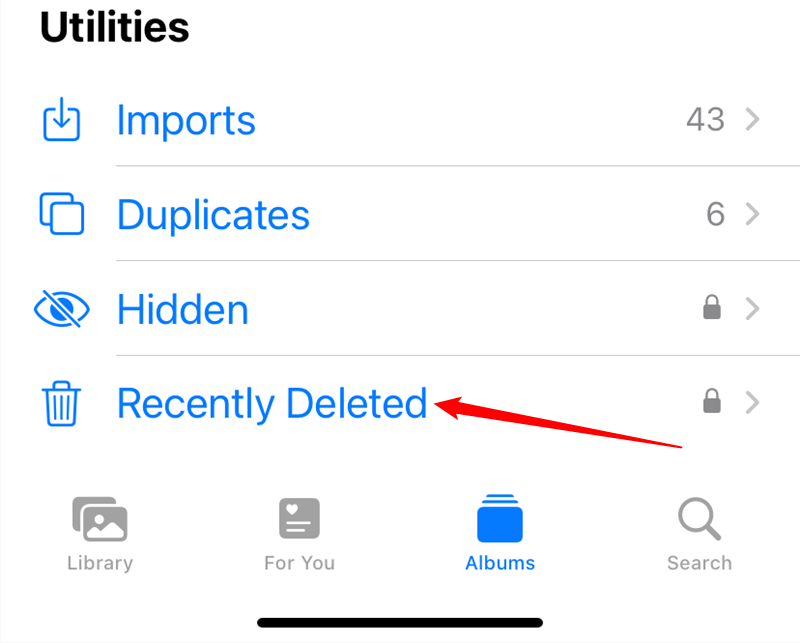
Next, scroll to the very bottom of the screen and tap “Recently Deleted.” Here, you’ll see all of the photos and videos that you deleted less than around 40 days ago. Anything older than that will have been removed, but this is absolutely the first place to check.
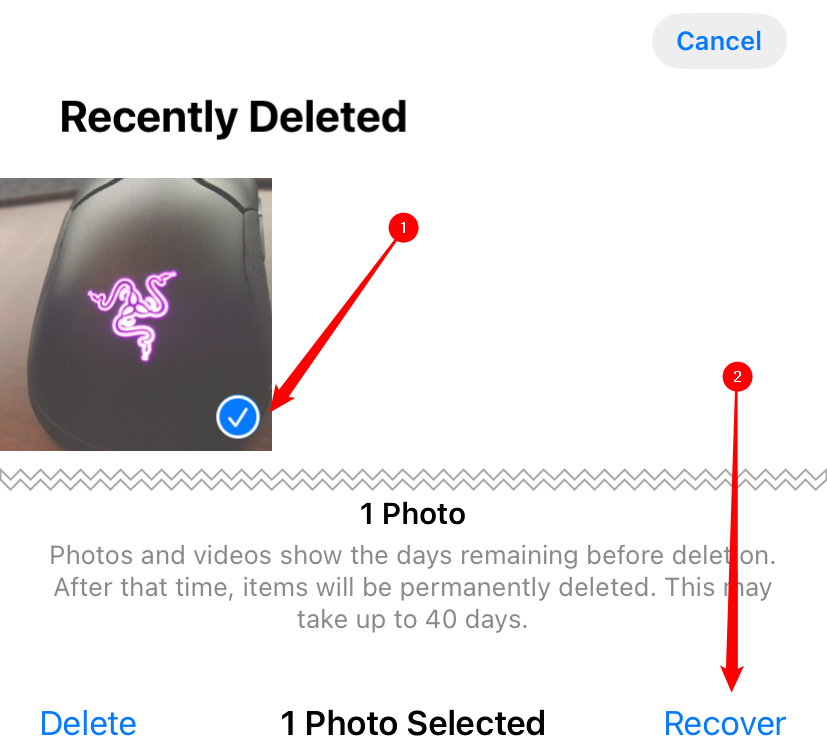
If your photo is there, select it, tap “Recover” at the bottom of the screen, then tap “Recover Photo” again.
Recover Photos from a Backup
If you plug your iPhone into a computer to back it up via iTunes, some tools can dip into those backups and allow you to extract individual files from them.
One such tool is iBackup Extractor , and it’s available for both PC and Mac. There are similar apps out there, all doing what amounts to the same thing — opening iOS backups that have been created by iTunes and allowing people to interact with them. If you know that the photo you need to recover is included in an old iTunes backup, this could be a great option to take. Especially if the photo was deleted more than a month ago.
iMazing is another tool that is pretty popular, and has a few other useful features besides managing backups.
As always, be careful using third-party apps to handle your phone backups. Phone backups almost always contain sensitive information, and a malicious, fake app could compromise your data.
Restore your iPhone from an iTunes Backup
If you’d rather not use a third-party app to recover your photo, you could also completely restore your iPhone using an old backup. It should be noted that if you do go this route, you will lose any data that was created or changed since that backup was created. We would heartily suggest creating a fresh backup before restoring anything, just to be sure.
Assuming you do want to go this route, connect your iPhone to a computer and open iTunes if it doesn’t open automatically. Next, click the device icon associated with your iPhone.
![]()
To start the restore process, click the “Restore Backup” button. You will now be prompted to select the backup that you wish to restore. Select it, and then click “Restore Backup.”
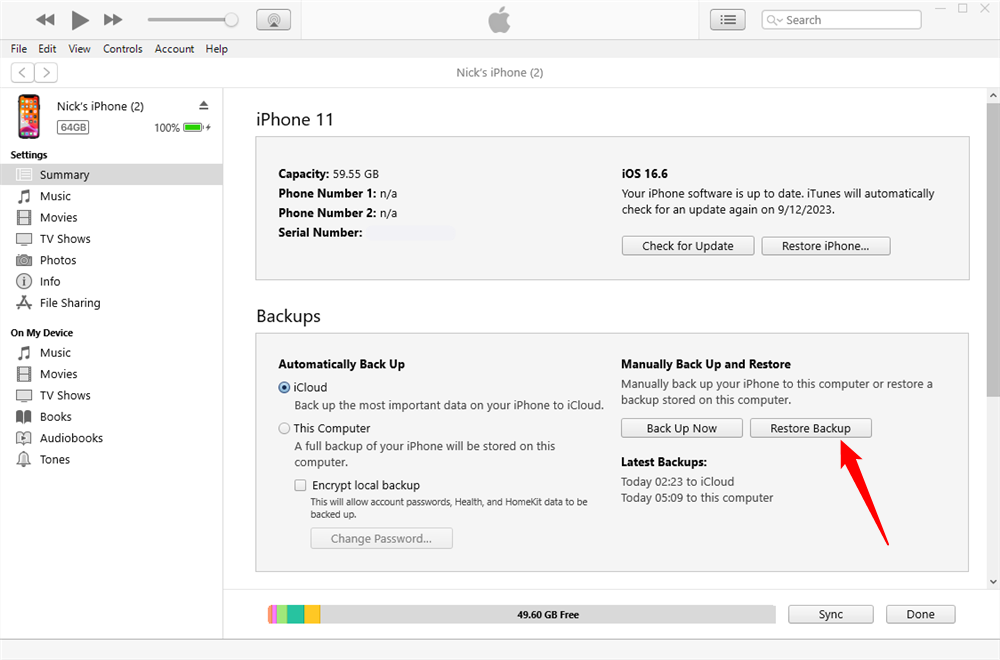
Your iPhone will now apply the previous backup and then restart. Once complete, iTunes will reconnect, and you can then check that your missing photo is present and correct.
Restore Your iPhone From an iCloud backup
If you don’t back your iPhone up via iTunes but use iCloud instead, you can restore from one of those previous backups, too. All of the same caveats apply here, so we again suggest making a full iTunes backup before attempting to restore anything, just in case.
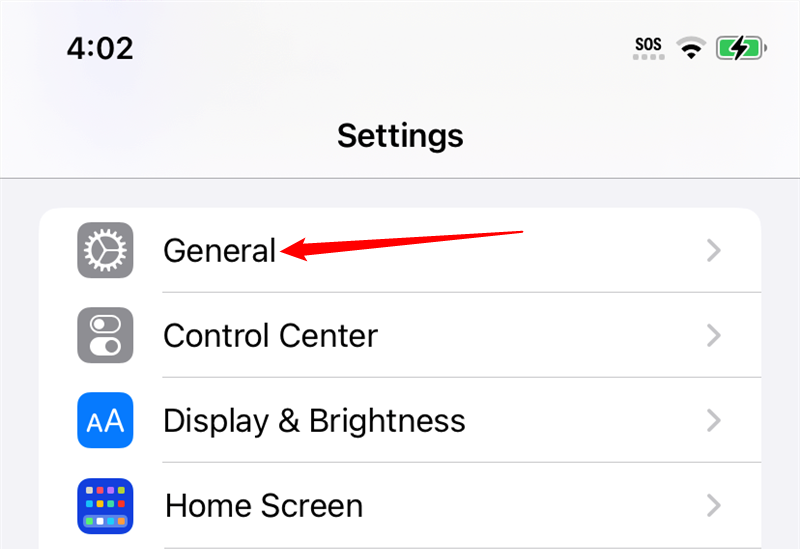
With a new backup made, open the Settings app and then tap “General.”
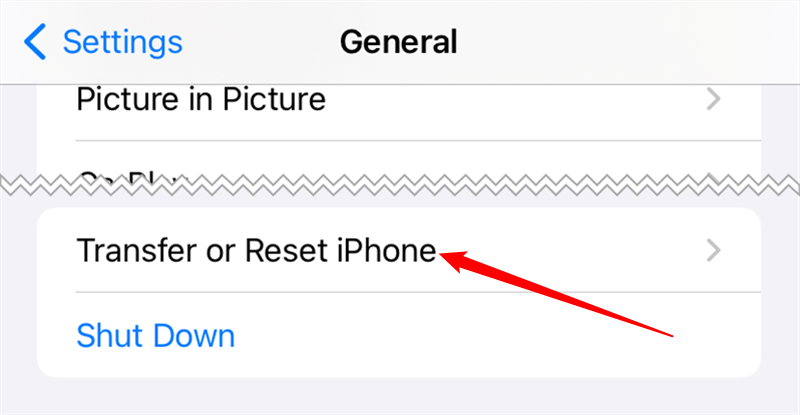
Next, scroll all the way down to the bottom and tap “Transfer or Reset iPhone.”
Finally, tap “Erase all content and settings.”
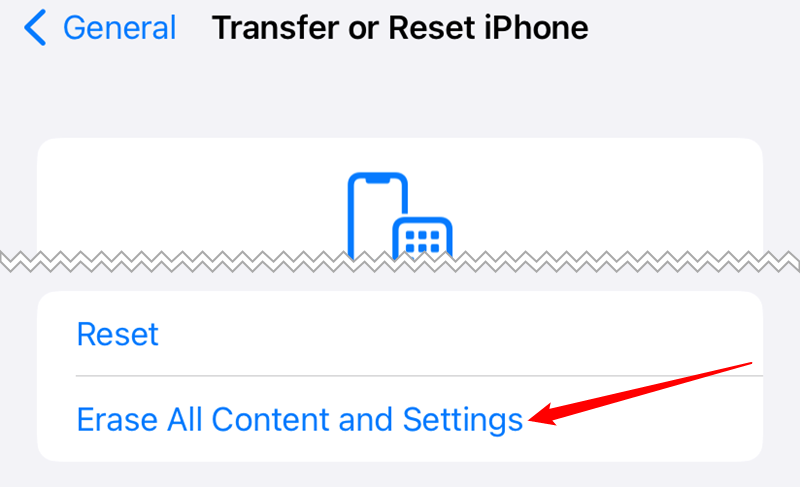
You’ll be prompted to authenticate before anything happens, but once you have done so the reset process will take place. Afterward, your iPhone will restart, and you can set it up as if it was a new iPhone. When doing so, select the option to “Restore from iCloud Backup” and be sure to select one from a time before when you believe the photo was deleted.
Also read:
- [New] 10 Insider Secrets for Smarter Pixlr Usage for 2024
- [New] 2024 Approved Discovering Free SRT Excellence Our Top 8 Picks
- [New] In 2024, Extracting YouTube Content with Ease
- [Updated] 2024 Approved A Complete Tour Through Discord's Capabilities
- 1. Step-by-Step Guide: Creating and Installing Personalized iPhone Ringtones
- 2023'S Most Popular Apple Watch Choices - Expert Reviews & Comparisons
- Latest Canon MP250 Driver Software Updates for Smooth Printing Experience
- Mastery in Video Creation Using Captivate Software
- New 2024 Approved 10 Free Open-Source Security Camera Software Options for Customization
- Top Electric Luxury Cars : Comparing Tesla Model S, 3, X & Y - Insights From ZDNet
- Unlock the Power of Non-Touch Interactions with Apple Watch Series 9’S Advanced Neural Engine and Hand Gestures Features
- Unlocking Productivity with a Top Secret Markdown/Note Taker That Revolutionizes Your Workflow!
- Unraveling the Secrets Behind the iPhone's Dominance in Video Playback
- Unveiling the Milestone: The Birth of the First Smartphone
- When and How to Deactivate Apple's Find My iPhone Feature - Insights and Instructions
- Winning the Battle Against Unresizable GIFs in Discord for Windows 11
- Title: Step-by-Step Guide: Retrieving Lost Images From an iPhone/iPad
- Author: Daniel
- Created at : 2025-02-18 18:07:13
- Updated at : 2025-02-20 02:59:55
- Link: https://os-tips.techidaily.com/step-by-step-guide-retrieving-lost-images-from-an-iphoneipad/
- License: This work is licensed under CC BY-NC-SA 4.0.