Ultimate Guide to Setting Up Emergency Calls on Your iPhone

Ultimate Guide to Setting Up Emergency Calls on Your iPhone
Quick Links
- Turn On Emergency Bypass for Phone and FaceTime Calls on iPhone
- Activate Emergency Bypass for Text Messages on iPhone
Key Takeaways
- You can enable Emergency Bypass for specific contacts to let them reach you while using Do Not Disturb mode for phone calls, FaceTime calls, and text messages.
- To activate Emergency Bypass, go to the Contact’s page, tap “Edit,” select “Ringtone” or “Text Tone,” and toggle on “Emergency Bypass” option.
If you’d like to allow certain people to call, FaceTime, or message you when you’ve enabled Do Not Disturb mode , activate your iPhone’s Emergency Bypass option for those people. We’ll show you how to do just that.
When you enable Emergency Bypass for a specific contact, they can reach out to you even while you’re on DND mode. You can enable this feature for phone and FaceTime calls and text messages separately.
Turn On Emergency Bypass for Phone and FaceTime Calls on iPhone
To allow people to get through your iPhone’s Do Not Disturb mode, first, launch the Contacts app on your phone.
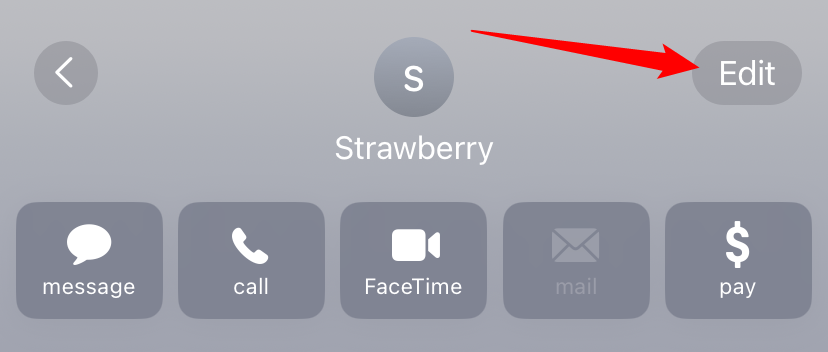
In the Contacts app, find and select the person you want to whitelist. On the contact page, in the top-right corner, tap “Edit.”
On the edit screen, scroll a bit down and choose “Ringtone.”
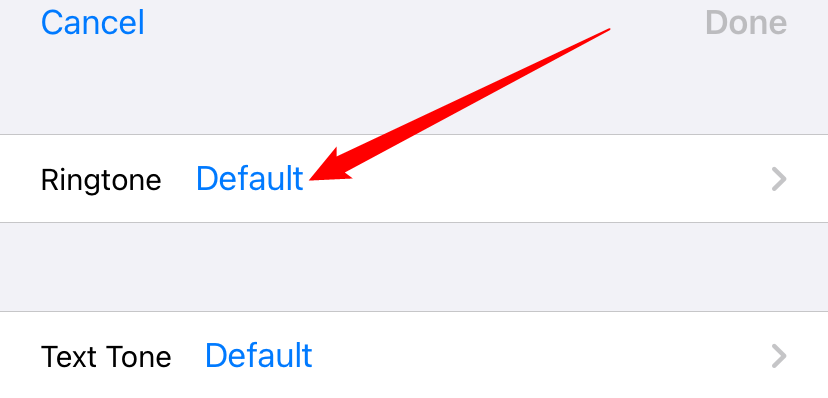
On the “Ringtone” page, at the top, toggle on the “Emergency Bypass” option. Then, at the top-right corner, tap “Done.”
Later, to disable the feature, turn off the “Emergency Bypass” option.

And that’s it. Your selected person will now be able to make regular and FaceTime calls with you even when you’ve chosen not to be disturbed.
Activate Emergency Bypass for Text Messages on iPhone
If you want certain people to send you text messages when you’re on DND mode, first, launch the Contacts app on your iPhone. Then find and tap your contact.
On the contact page, in the top-right corner, tap “Edit.”

Scroll the edit page a bit down and tap “Text Tone.”
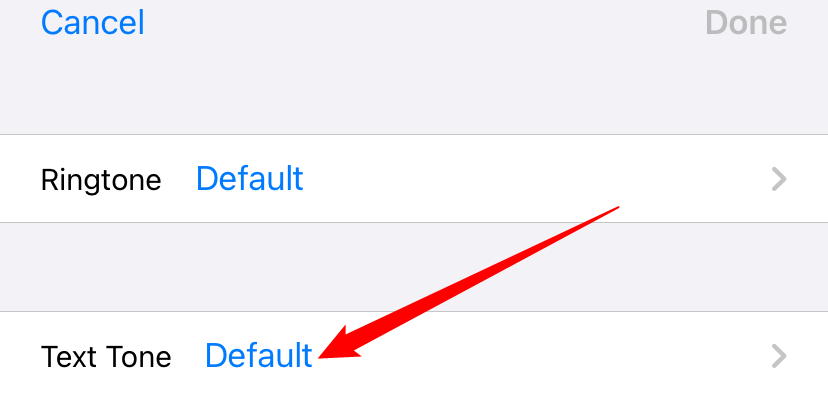
On the “Text Tone” page, at the top, enable the “Emergency Bypass” option. Then save your changes by tapping “Done” in the top-right corner.
In the future, to deactivate the feature, simply turn off the “Emergency Bypass” option.
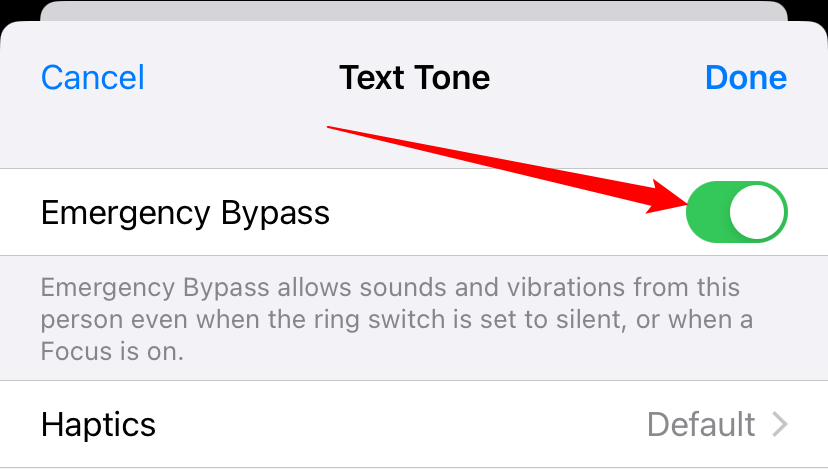
Your iPhone will now allow text messages from your selected contact whether you have or have not enabled Do Not Disturb mode. You’re all set.
Want to start getting calls and messages from your blocked contacts? If so, you’ll have to unblock those contacts first.
Also read:
- [New] Social Media Savviness Mastering 4 Techniques to Record Facebook Lives for 2024
- Bid Adieu to Expensive Eyesight Solutions: Discover How These Budget-Friendly XR Glasses Outperform the Pricy Apple Tech and Save You Money!
- Comment Uploader Un FILM Sur L'iTunes Store : Guides Faciles Avec Movavi
- Discovering Elite GIF Apps for iPhone X/8 Series
- Double Click Success: Why a Two-Mouse System Reigns Supreme
- Expert Evaluation of the Nintendo Switch: Unrivaled Mastery in Handheld Gaming
- In 2024, How to Check Distance and Radius on Google Maps For your Honor X8b | Dr.fone
- Quick Guide to Change DALL-E 3'S WebP Output Into PNG or JPG Formats
- Tough & Trustworthy Under-$100 Storage Options
- Ultimate Backup Strategies for Your iPhone : Mastering PC/iCloud/iTunes Techniques with Simple Steps
- Ultimate Guide: 8 Proven Methods for Securely Preserving iPhone Contact Information
- Ultimate Guide: Top 5 Methods for Saving & Moving Your iPhone's SMS
- Unraveling the Secrets of Complete iCloud Backup Mastery in One Essential Guide
- Title: Ultimate Guide to Setting Up Emergency Calls on Your iPhone
- Author: Daniel
- Created at : 2024-10-14 11:38:56
- Updated at : 2024-10-18 01:23:47
- Link: https://os-tips.techidaily.com/ultimate-guide-to-setting-up-emergency-calls-on-your-iphone/
- License: This work is licensed under CC BY-NC-SA 4.0.